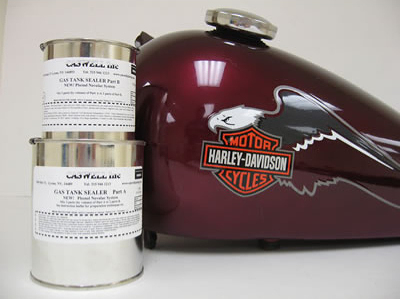
Home!

Search!            Dealer Inquiries Invited!

218_01_2009_001.jpg (84556 bytes)
2009
Triumph Calendar

Gas Tanks
06_2701_192_001.jpg (29506 bytes)

Commando

83_1798_001.jpg (8802 bytes)
60's Bonnie Tank
News Flash!
Now on hand!


335_02_A_002.jpg (6850 bytes)
Sealed Batteries


K&N Air Filters

711_z629_001.jpg (18155 bytes)711_z629_002.jpg (18667 bytes)
T150/A75
Raygun Mufflers


ferodo_large.jpg (4541 bytes)
Brake
Shoes & Pads

SRM_logo_001.jpg (13010 bytes)


Tel: (902)542-7478 - Fax (902)542-7479
info@britcycle.com
Helping keep British Motorcycles on the road 
for over 30 years - established 1977!

TriSparkLogo.jpg (10547 bytes)

Boyerlogo1.jpg (11523 bytes)

646_13_001.jpg (34873 bytes)
Oil Pressure
Gauges


567_32.jpg (16992 bytes)
567-32 Panel Set 
Get the
Pre Oil-In-Frame
look on your
Oil-In-Frame
Triumph

465_02_A_001_small.jpg (41318 bytes)
Hayward
Belt Drives

391_53973_led_003.jpg (44968 bytes)
391-53973/A LED Kit  

391_53454_led12v_001.jpg (17379 bytes)
391-53454/A
LED Kit

BBK_universal_001.jpg (45136 bytes)

Crankcase
Breather Kits

Products Just In!
AndrewLeathers002.jpg (207439 bytes) Visit Andrew Cowell
Our Sponsored Racer
at a track near you!
Business Opportunity:
Silkscreening
Equipment For Sale
 

Catalogue Download
& Printed Edition 13


Pricelist by E-mail


Tech Help Files


Products Numerically

Products Alphabetically

Gift Suggestions

Products Just In

Products Coming Soon

Books

Treasures from the Obsolete Room

Product Brand Names

Complete Product List


Brochure Gallery


Bikes for Sale

Bikes Wanted

Staff Bikes

Customer Bikes

Stolen Bikes

Vincent Visit

Sponsored Racer


Event Links

Vintage Links


What's New at BCS?

About Us

Why Deal With Us?

Ordering

Return Policy

Privacy Policy

F.A.Q.


USA Warehouse

Canada Eh!


Tattoos


235-02 Gas Tank Sealer
PHENOL NOVOLAC EPOXY GAS TANK SEALER


Phenol Novolac Epoxies are a new breed of chemical resistant materials, able to withstand permanent immersion of many harsh solvents, fuels and oils. This Epoxy has much better bond strength than single component products, with strengths of up to 3000 PSI, and this higher strength reduces the need for a clinically clean surface, as the epoxy actually prefers to bond to a rough rusty surface. Our new phenol novolac is more thixotropic, which means it 'hangs' on the tank walls during the coating process. This gives a thicker overall coating. There is more volume of material in the kit to allow for this.

Application Instructions
(pdf instructions)

All traces of oil and gasoline should first be removed by pouring about 1 pint of acetone or lacquer thinner into the tank, and rotating the tank several times to thoroughly sluice the sides with solvent. Dispose of the contaminated solution.

When recoating your gas tank from failed Kreem or POR-15 tank sealers, remove the old, failed coating using a paint stripper containing Methylene Chloride.

Place a hand full of drywall screws into the tank and shake them around vigorously for several minutes. These will dislodge any loose particles of rust. In the case of Fiberglass and plastic tanks, this will rough up the tank interior, improving adhesion.

Rinse out the tank with about 1-pint of acetone or lacquer thinner, then set aside and allow to dry. Use an airline to blow air into the tank to aid drying.

Apply duct tape or masking tape to any weeping seams, holes or porous areas. This will stop any Gas Tank Sealer from oozing out, and will allow it to bridge over the hole. Plug the outlet ports with putty or Play-Doh. Mix up the required amount of Gas Tank Sealer (one unit should treat two x five gallon tanks) If you are only treating ONE 5 gal (or smaller) tank, then divide parts A & B in half. You could use a dipstick to gauge this.

In a separate plastic container (margarine tub etc.) mix the two parts together thoroughly for at least 2 minutes. Scrape around the sides to ensure all resin is blended together. BAD MIXING AND BAD MEASURING IS THE #1 CAUSE OF FAILURE!!

Pour into the tank, then immediately seal up the filler hole with Gladwrap and an elastic band. Swill the tank around in every direction for several minutes to obtain a good layer of Gas Tank Sealer over all surfaces. Remove the filler cap,Gladwrap seal, and pour out any excess. Allow to drain upside down for a few minutes.
If you have a built in fuel filter, blow air into the fuel line port for about 10 minutes. This will clear the filter of any Gas Tank Sealer.

Scrape off any excess with a sharp knife at this point (usually about 40-60 Min after mixing) Place the tank in a warm 70-90 f place and allow to cure overnight. In the case of alcohol fuels, allow 3-5 days at room temperature, or 24 hours at 120 deg f.

1 Pint Of Epoxy Gas Tank Sealer coats up to 2 x 5 gal tanks

Note: 2 part epoxy, no solvents, so ground shippable mail and UPS. Customers clean tank using thinner and screws, not included. Guaranteed with alcohol and fibreglass.
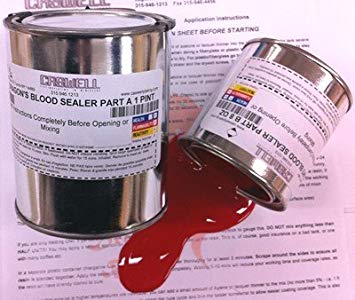
Hit Counter


Copyright © 2007 British Cycle Supply Company Ltd.  All Rights Reserved.

All Trade Marks, Registered Marks and Trade Names are the Property of their Respective Owners

info@britcycle.com